How To Put Together the Chibi Yeti Paper Toy
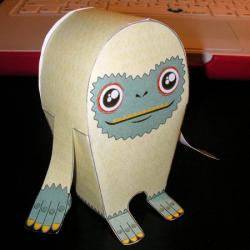 I have a love/hate relationship with the Craftzine blog. I LOVE them because they find cute little guys like this for me. I hate them because they post SO many items that it’s time-consuming just to scroll past them all. They post so many things that they don’t have time to try out the things that they post, so they will link to things that have instructions in French, no instructions at all or in this case, instructions written by a graphic artist.
Christopher Bonnette, the creator of Macula.tv, is genius, but not a writer.
When Craftzine linked to Macula.tv’s Chibi Yeti Paper Toy on Flickr, I was so excited. I love these little papercraft figurines. Unfortunately, the directions were cryptic at best. I was about to give up, but I looked at Christopher’s website and everything there was so beautiful, I decided there MUST be a way to put it together and have it look good. Fortunately, I had just enough experience in topology to fathom it. If you would like to make this little guy, continue reading for more specific directions:
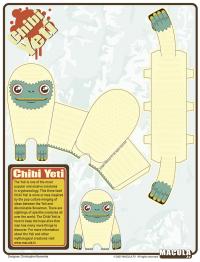 The first thing you need to do is print up Macula.tv’s Flickr download. I used cardstock because it’s a little more sturdy than paper. The next step is to cut out the body and the arm pieces. When cutting, follow the dark line, not the white bit outside of it.
When you’re cutting out the arms, make sure you cut along the line. It goes into the body a bit and it’s essential that you make that cut for the arms and body to fit together.
My biggest problem was figuring out how the arms attached to the body. I tried to wrap them around the back. I tried slipping them through the middle. It was pretty obvious that the arms should be on the outside because they were covered in Yeti fur, but I had a hard time understanding how they were supposed to attach to the body until I realized that they go over the head.
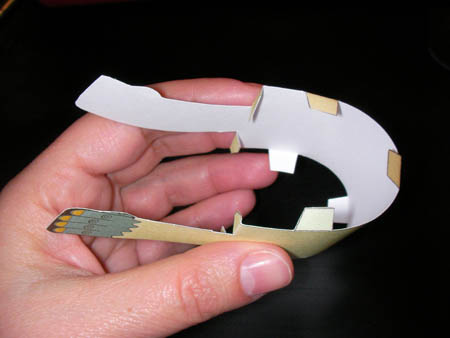
Once I realized that, the only difficulty was gluing the tabs. I started with the arms. If you notice, I folded down the arm tabs, DON’T DO THIS. It’s much easier to get the arms to stay if you don’t fold those tabs.

Glue the arms to the Yeti’s left side first, then glue them to the right side. Don’t close up the Yeti’s body yet.
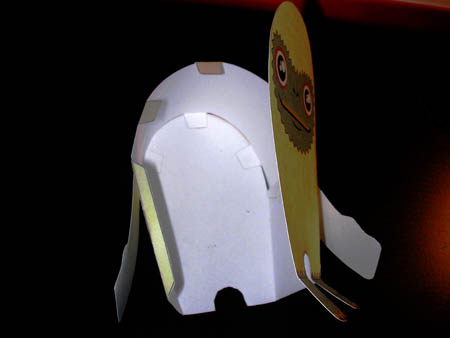
Now, glue the three tabs along the top to the curved part of the back of the Yeti’s head. Wait until the glue has dried enough to hold before you move on. When the glue is complete, you can add glue to the side tab and each of the three tabs that attach to the curve along the top of the face. Turn the Yeti over and use a pen to press down on the tabs so that they glue will hold and dry.
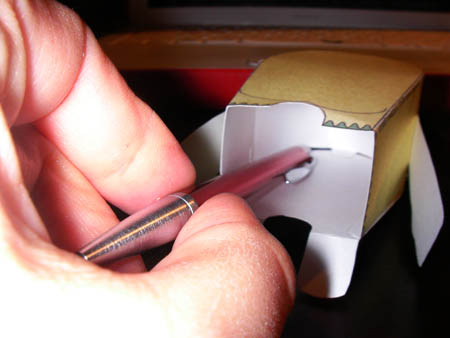
The inside should look like this:
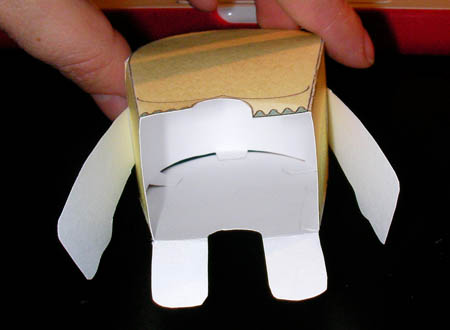
When you’ve finished, fold the feet flat and roll the arms around a pencil a bit so that they have a little life to them. He should stand on his own and be a fun little friend for you to enjoy!


thanks for the tutorial! when i downloaded the flickr image, it was really, really pixelized. i think i’m a little brain dead, cause i can’t figure out how to download it as a larger file size. can you help? how big is your yeti?
Comment by ann — 1/18/2008 @ 11:22 am
On the Flickr page, click on “All Sizes” and download the largest size.
Comment by Laura Moncur — 1/18/2008 @ 2:33 pm