How To: Steampunk Brass Ray Gun
I’m getting ready for Halloween and I finally have my steampunk weaponry ready to go. Here is a video of it in action:
If you would like to see how I made it, a tutorial follows:
I made this ray gun from a brass candlestick wall sconce. It looked like this when I bought it at the thrift store.
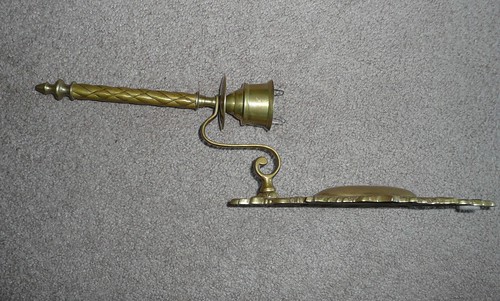
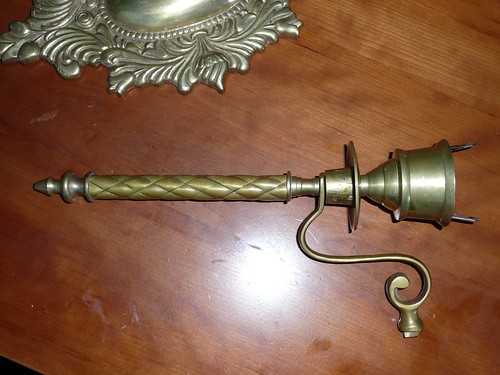
I liked the shape of the wall sconce before I even altered it. Here is a photo of it from the side. It was nearly perfect without any changes, so making it a ray gun was fairly simple for me.
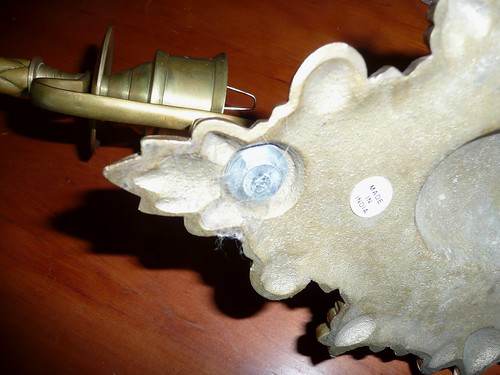
The important thing to remember when you are choosing a candlestick holder to convert into a steampunk accessory is that it’s put together with screws, NOT welded. As you can see, the candlestick was bolted to the wall sconce.
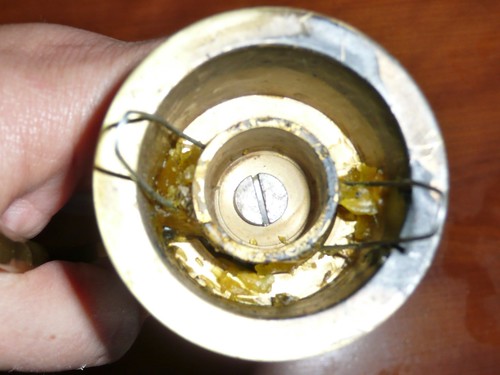
Additionally, the candlestick holder itself was held together with a large screw. If it had been welded, I wouldn’t have been able to take it apart and reassemble it so easily.
Once I took it apart, I had a wide variety of parts available.
When I put them back together, however, the screw that originally held together the candlestick holder wasn’t long enough, so I had to get a new one. I took the original to the hardware store and used the in-store display to find out the size and threading so I could buy a new one with the exact same diameter and threads, but an inch longer.
I originally tried to attach a Gatorade bottle to the back of the gun for the “reservior,” but the mouth of the bottle was too large. Michael suggested that we go to the grocery store to find a better bottle. Of course, he was embarrassed when I brought the partially assembled ray gun into the store to make sure we got a good one, but he was willing to help me otherwise. The Sobe Life Water bottles were the best, both for the lid size AND the bottle design.
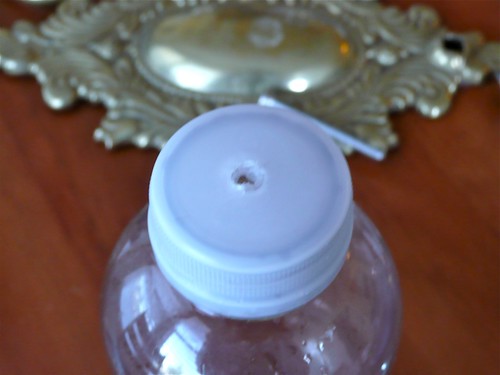
So, I chugged a bottle of fruity water, and removed the label. Attaching it to the hardware required that we drill a hole in the lid of the bottle. This is harder than it looks. It’s surprisingly difficult to get a hole in the exact middle of the bottle. We actually put the lid on the bottle, drilled the hole, swore a lot and then chugged another bottle of Sobe and tried again. It might have been easier if we had used a drill press, but we did it with a hand drill.
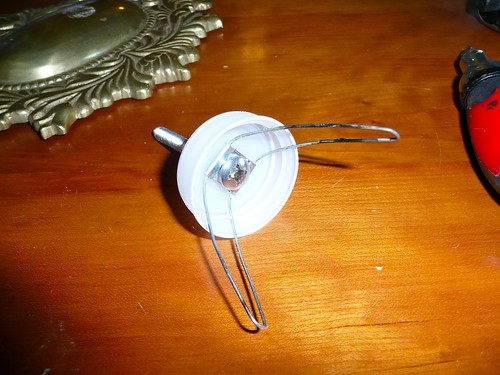
After we drilled the hole, we removed the lid, and threaded the candlestick stabilizer and the longer screw through it before attaching it to the rest of the ray gun hardware.
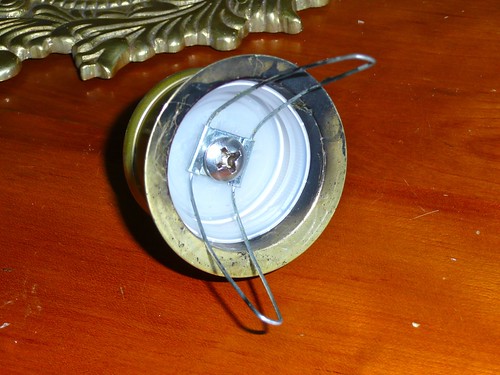
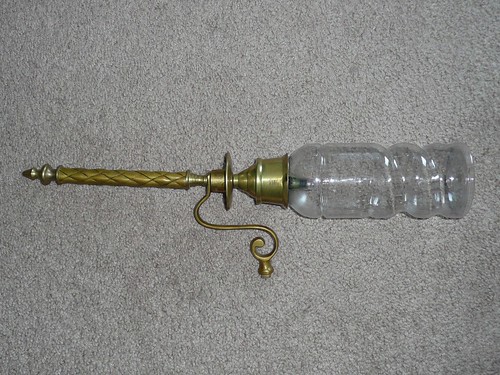
Because we chose a bottle with the right sized lid, it fit nicely into the candlestick hardware.
With the hardware all together, it looked like this. The parts have been a little mixed around to make it look more like a gun and less like a candlestick holder.
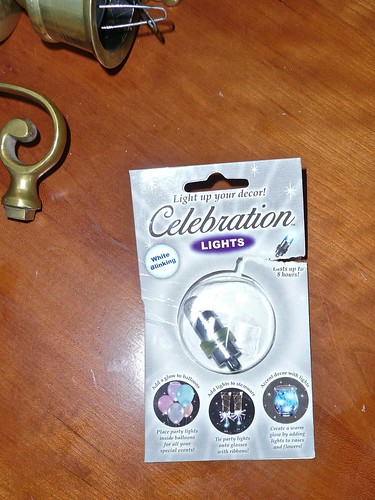
I wanted my ray gun to light up, so I chose balloon lights. They are tiny LED lights that fit inside balloons and make them light up. I found these at Michael’s Arts and Crafts. They are awesome because you can turn them on and off and you can replace the button battery when it finally goes out.
I had some vague idea of using twist ties to attach the balloon light, but Michael showed me how to repurpose the candlestick stabilizers to hold the lights. It was a much more elegant and useful design.
Once the light was in place, the bottle screwed in over it easily, but it looked a little bland. Plus, it was too easy to see the light.
So, I found some Krylon paint at Michael’s that said it worked on plastic. For the record, it does work on plastic REALLY well, but there is lead in the paint, so if you have kids or are trying to get pregnant, let someone else do this step. Either way, it would be smart to wear gloves when you spray paint into the plastic bottle and do it outside. This is a VERY messy step and this paint will NOT clean up nicely.
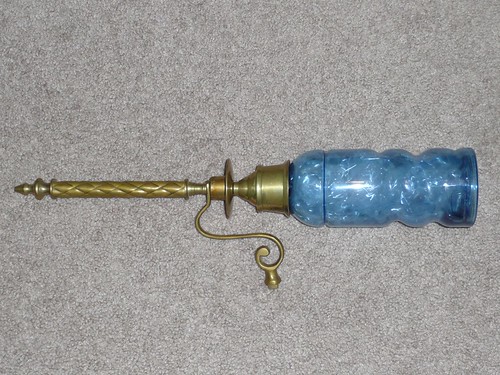
I sprayed the paint inside the bottle and allowed it to dry, but even with two coats, I could still see the light inside the bottle. It didn’t look like liquid in the ray gun. It just looked like a blue bottle.
For the final step, Michael suggested that we put some basket wrapping Mylar into the bottle. I tried colored Saran Wrap first, but that stuff stuck to itself too much to be useful. The Mylar is stiff enough to fill the bottle, hide the balloon light and clear enough to defract the light nicely.
This entire project took a couple of days to complete, mostly because we had to keep going to various stores for parts that we didn’t realize that we would need. You should be able to do it in a couple of hours if you have all the parts.
Parts List:
- Brass candlestick holder
- Replacement screw in the same diameter and threading, but one inch longer than the original.
- Bottle of Sobe Life Water (or two or three depending on how well you can drill a hole).
- Balloon Light
- Krylon Stained Glass paint in your favorite color.
- Basket wrapping Mylar
Tools List:
- Screwdriver and Bolt set
- Hand Drill
- Gloves to protect your hands when you spray paint within the bottle







A: You are so freaking crafty and imaginative! B: I love that you’re getting ready for Halloween already!
Comment by Braidwood — 8/16/2009 @ 1:27 pm
i.am.jealous. really jealous.
Comment by nakedjen — 8/17/2009 @ 5:21 pm
Jen,
I made two… You can use one if you want!
Laura
Comment by Laura Moncur — 8/17/2009 @ 5:31 pm
Hello, I found this tutorial while searching for Ideas on the net. This is a great example of some diy niftyness. I am currently making a raygun of sorts. Instead of lights it has a speaker in it that emits an alarm whenever the trigger is depressed. it was really easy to put together and theonly bit of trouble that I had was getting the bigger speaker in it and the trigger. as soon as I have it complete I will post a picture on DeviantArt.com for viewing. Thanks again for the tutorial. Cheers.
Comment by weazel5616560 — 8/5/2010 @ 6:18 pm